Building a Smart Lamp
- 1 minA few months ago when I was getting ready to bed and wanted to turn off the lights, the usual routine started with complaining the switch being too far away. Then I will mimic the ‘spiderman web shot move’ to turn off the switch, but that never works. Until one day it dawned on me, I could buy a lamp that is connected to my phone! Googled it, too pricey. Fine, I decided to make one from the items I have in my room from my past courses taken at the University.
So ever wonder how to build a classic smart lamp? Continue reading to find out!
Items required:
- Photon MicroController
- Breadboard
- 300 ohm Resistors
- 10 microfarads Capacitors
- Jumpers
- Neopixel LEDs for colours
Assembling the circuit
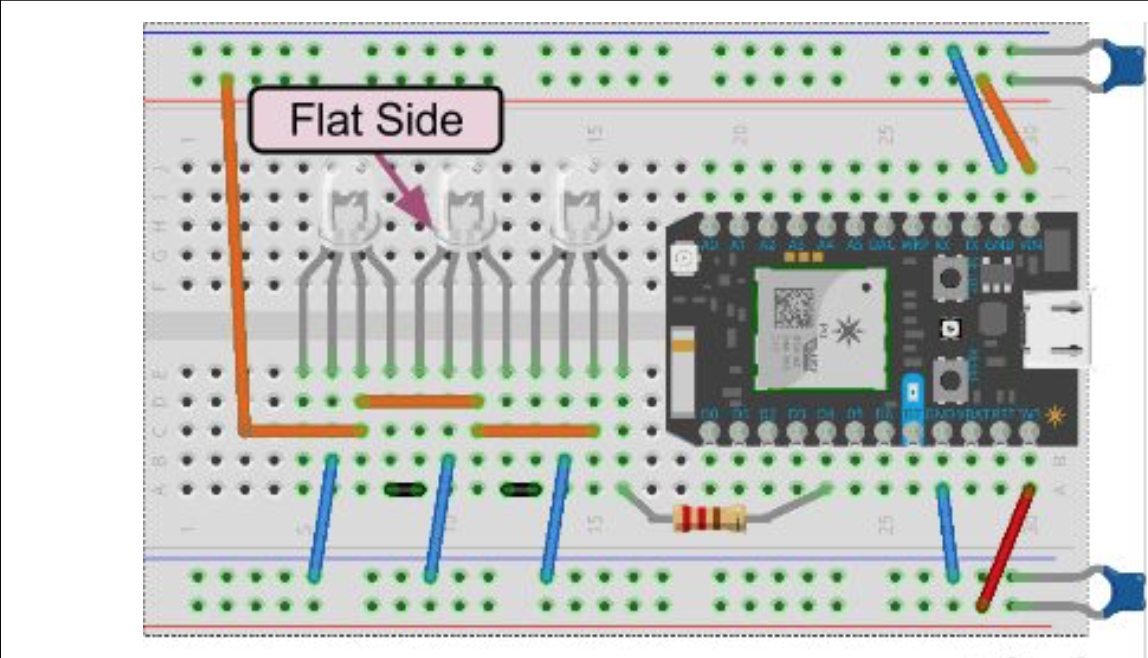
Grab a breadboard and start plugging in the components based on the image shown below! Make sure you don’t mess up with the positive and negative terminals. Or else you might see some fireworks :D

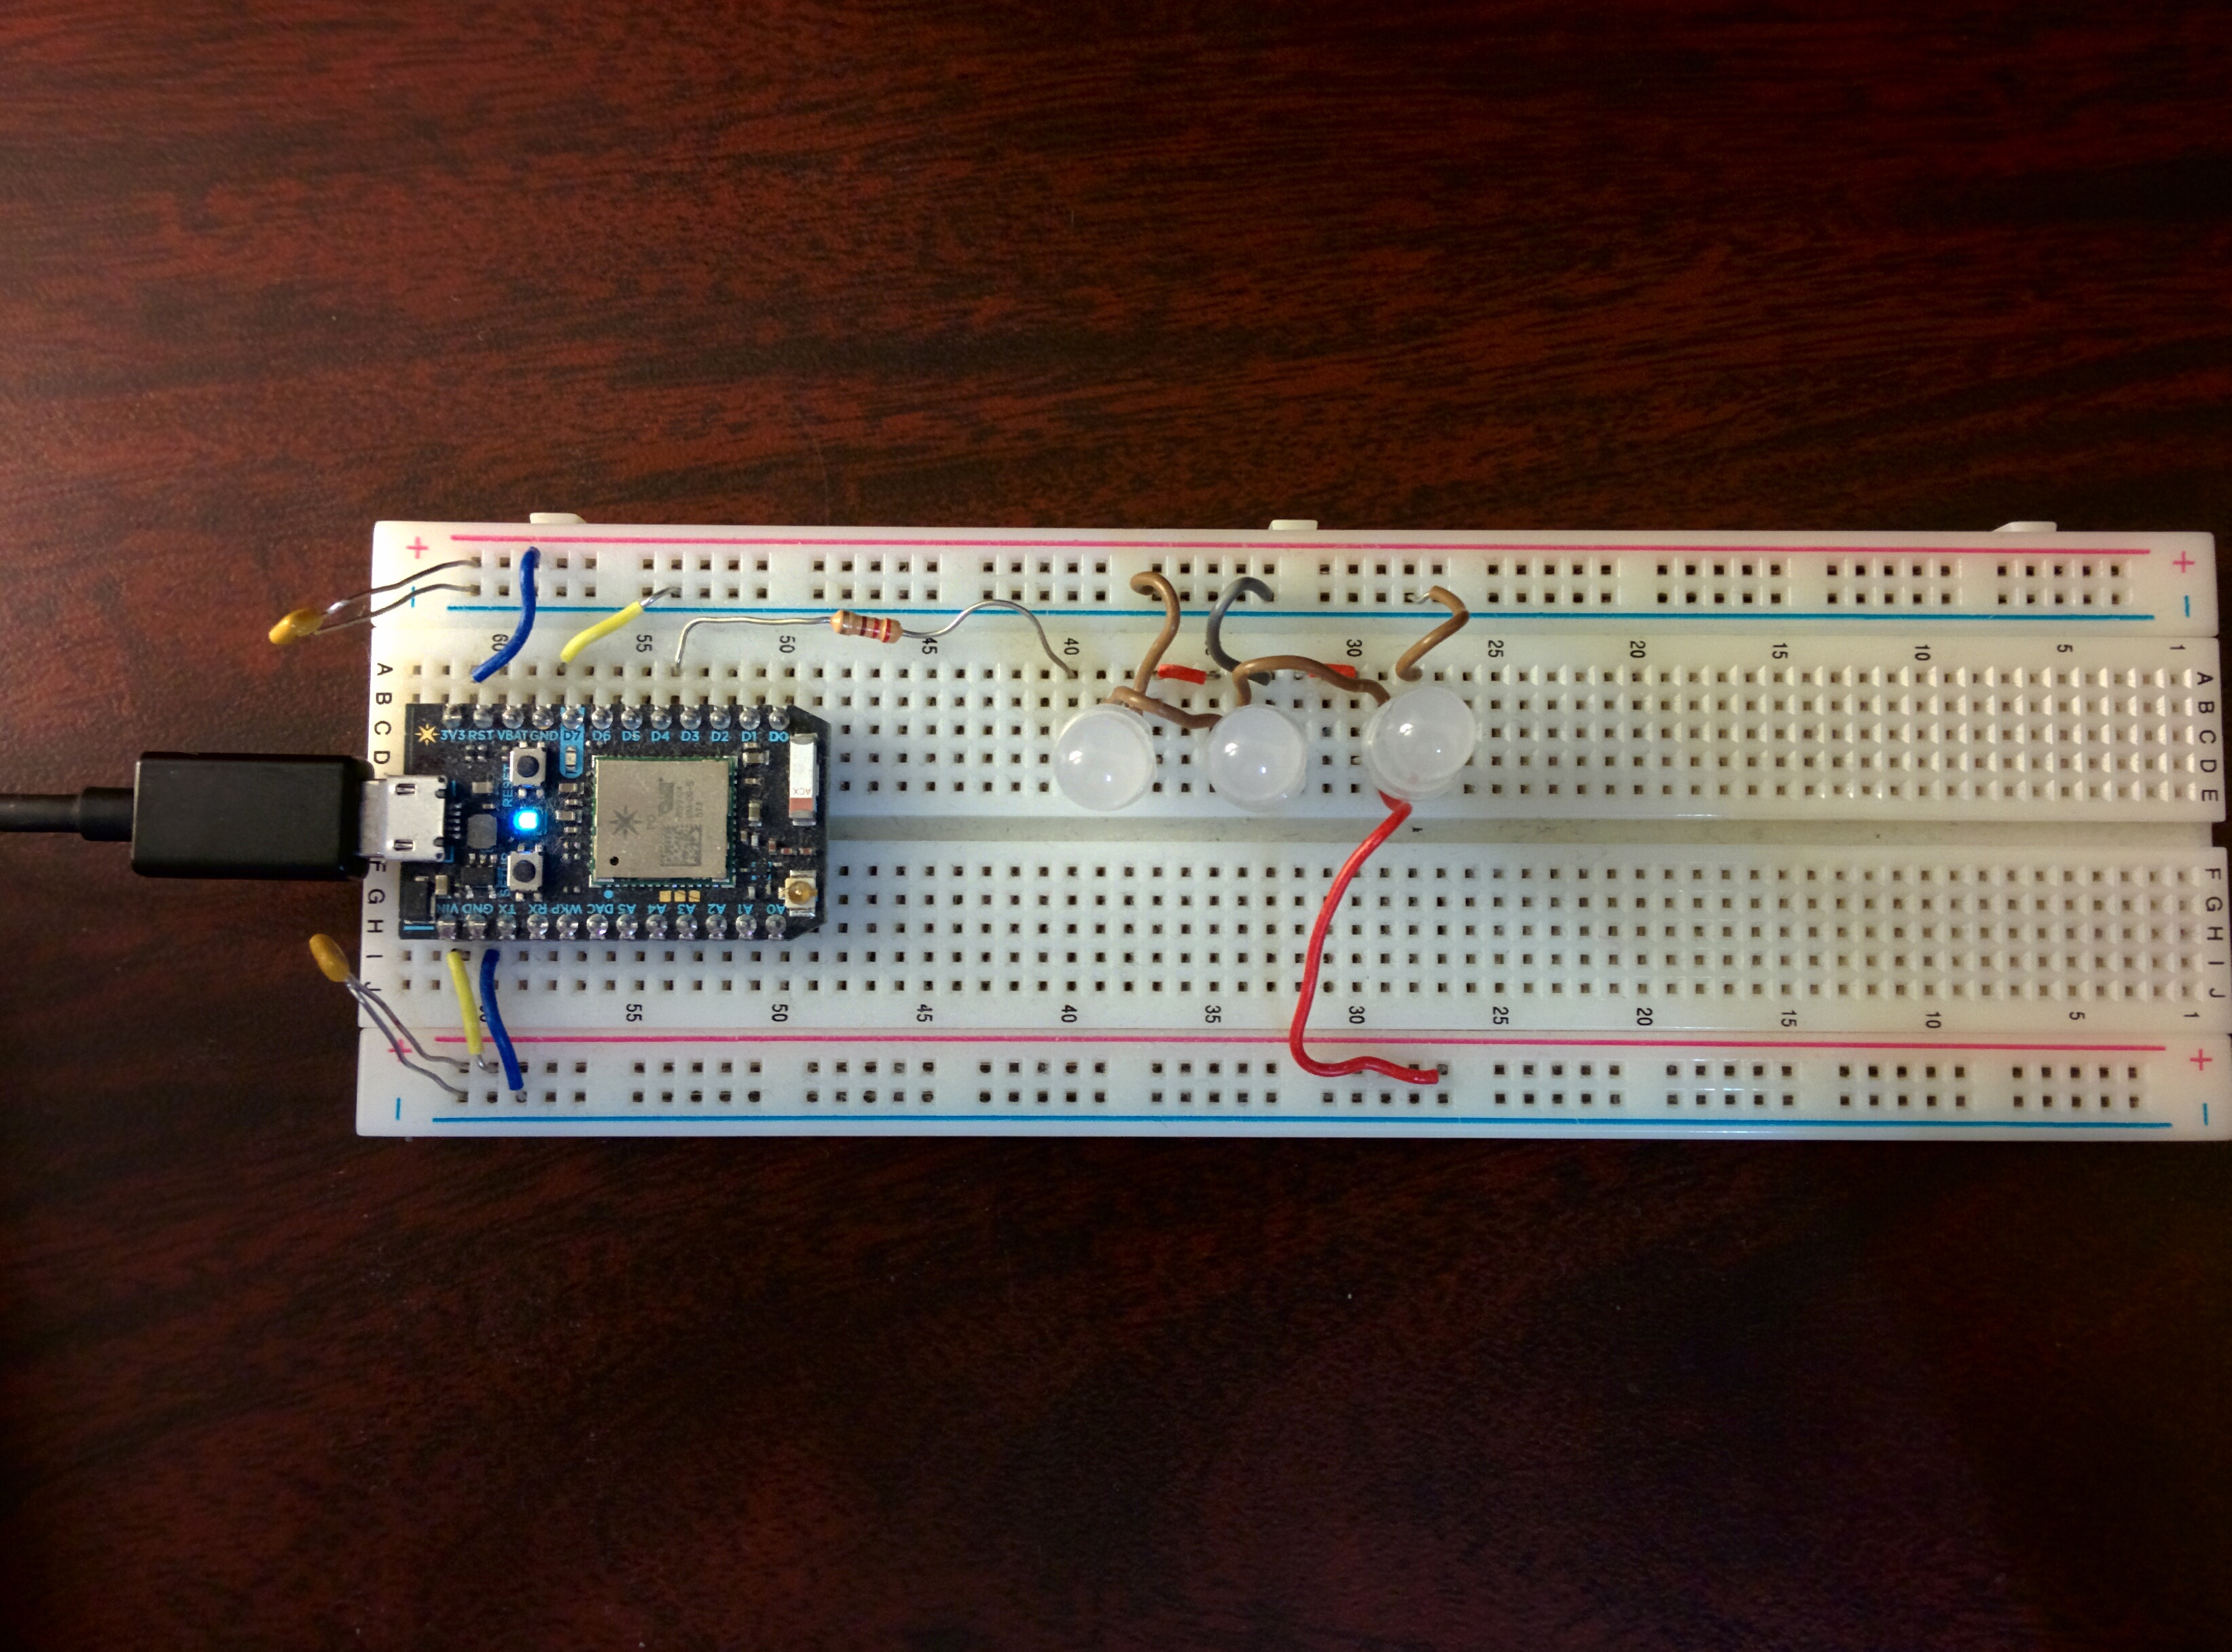
 This is what your circuit board should look like
Setting up the Photon
I won’t go over the details here, but you should check out their tutorial on setting up your Photon.
Coding the Photon
You can clone the repo or download it. Once you have the code, you can program the microcontroller via the Particle’s main IDE. The simple explanation of this is that they communicate all data via the Cloud :D
Web Interface
From the html code I uploaded. It will create a simple webpage so that you can use it on any wifi connected devices. MAKE SURE your device ID and access token in the html code are matched with your device!! You should be able to realize that when you follow the tutorial while setting up your Photon microcontroller.
Go ahead and click the options and click ‘Do It!’. Good work! You built a smart light. It is really amazing to see how convenient it is for us to build one as technology continues to improve.
